Blog
How to Repair Marble Countertops Burn Marks
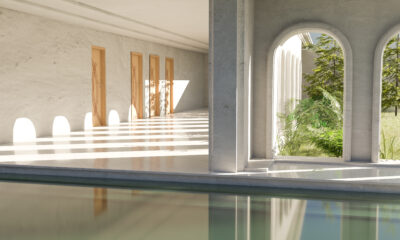
Marble countertops are a beautiful addition to any home, but they are not immune to damage, especially burn marks caused by hot pans, candles, or accidental heat exposure. These marks can tarnish the elegance of marble, but with the right techniques, they can be addressed effectively. Burn marks may range from superficial discolorations to deep-set damage, each requiring a tailored approach. This article will guide you through detailed solutions to restore your marble countertops, whether you prefer DIY methods or professional assistance. Read on for actionable steps and expert tips to fix burn marks and maintain the beauty of your marble surfaces.
Essential Steps to Restore the Shine of Marble
Restoring the shine of marble countertops after addressing burn marks requires a systematic approach. Here is a comprehensive guide to help you achieve a polished and gleaming surface:
- Step 1: Cleaning the Marble Surface
The first step to restoring marble is to thoroughly clean the surface. Dirt, dust, and residue can interfere with the repair process. Use a pH-neutral, non-abrasive cleaner designed specifically for marble. A microfiber cloth or a soft sponge is ideal for applying the cleaner, as it minimizes the risk of scratches. Avoid acidic or abrasive cleaning agents that can cause etching or further damage to the marble. Once cleaned, ensure the surface is completely dry before proceeding.
- Step 2: Addressing Burn Marks
Identifying the severity of burn marks is crucial. For surface-level burns, light sanding or buffing with fine-grit sandpaper can be effective. For deeper marks, applying a poultice made from baking soda and water can help draw out the discoloration. Spread the poultice over the burn mark, cover it with plastic wrap, and let it sit for 24 hours before gently removing it. Repeat the process if necessary until the burn mark fades.
- Step 3: Polishing for Shine
Once the burn marks are addressed, polishing the marble restores its natural shine. Use a marble-friendly polishing compound and apply it evenly using a soft cloth or mechanical polisher. Work in small sections to ensure consistency and avoid streaks. Buff the surface gently until it gleams.
- Step 4: Final Sealing
Sealing the marble is the last but essential step. A high-quality marble sealant protects the surface from future stains and burn marks. Apply the sealant according to the manufacturer’s instructions, ensuring even coverage. Reapply the sealant annually for optimal protection.

Choosing the Right Products for Marble Polishing
Selecting the right products is key to successful marble care. Not all cleaning or polishing agents are suitable for marble, so understanding the characteristics of ideal products is essential.
Characteristics of Ideal Products
The best products for marble are pH-balanced, non-abrasive, and free of harsh chemicals. These ensure the marble’s surface remains undamaged during cleaning and polishing. Look for products specifically labeled as “marble-friendly” or “stone-safe.”
Natural Solutions
DIY enthusiasts can use natural solutions like a baking soda and water mixture for gentle cleaning. However, caution is necessary when using natural acids such as lemon juice, which can etch the marble. Always test any natural solution on a small, inconspicuous area before applying it to the entire surface.
Professional Products
Professional-grade products, such as liquid polishes and stone-safe cleaners, are widely available. These products are formulated to enhance the marble’s shine while providing lasting protection. Choose trusted brands known for their reliability and effectiveness.
Common Mistakes to Avoid
Avoid using abrasive powders, vinegar, or bleach on marble surfaces. These can cause irreparable damage, including scratches and etching. Stick to products specifically designed for marble care to ensure the longevity of your countertops.
DIY Techniques to Make Marble Countertops Shine
For those who prefer a hands-on approach, DIY methods can be an effective way to restore marble countertops.
Step-by-Step DIY Polishing
To prepare a baking soda paste, mix one part baking soda with two parts water. Apply the paste evenly over the marble surface and let it sit for a few minutes. Using a soft cloth or pad, buff the surface gently in circular motions. Rinse thoroughly with water and dry with a microfiber cloth.
Homemade Polishes
Create a DIY polish by mixing a small amount of olive oil with baking soda and water. Apply the mixture sparingly and buff it into the surface with a soft cloth. This method not only enhances the shine but also adds a layer of protection to the marble.
Warnings and Precautions
Over-polishing or using inappropriate tools can damage the marble. Always use soft materials and gentle techniques to preserve the surface. Avoid excessive force, which can lead to scratches or dull spots.
How to Safely Clean Marble Before Polishing
Cleaning is a vital step in marble maintenance and sets the stage for successful polishing.
Dirt and debris can act as abrasives during polishing, causing scratches. Proper cleaning ensures the marble’s surface is free of contaminants that may hinder the restoration process.
Use lukewarm water mixed with a small amount of mild dish soap for safe cleaning. Avoid harsh or acidic cleaners, as these can damage the marble. A soft sponge or microfiber cloth is ideal for gently wiping the surface.
After cleaning, ensure the marble is completely dry. Any residual moisture can interfere with polishing products. Testing cleaning solutions on a hidden area first is recommended to ensure compatibility with the marble.

Preventive Tips to Maintain Marble’s Shine
Maintaining the shine of marble countertops requires consistent care and preventive measures.
Wipe down the marble with a damp cloth after each use to remove dirt and prevent stains. Address spills immediately to avoid permanent discoloration.
Use coasters, trivets, and placemats to shield the marble from hot pans, acidic foods, and moisture rings. Avoid placing sharp objects directly on the surface to prevent scratches.
Seal the marble annually to maintain its protective barrier. Professional polishing every few years can enhance the marble’s longevity and keep it looking pristine.
Professional Help: When and Why It’s Necessary
While DIY methods can address minor issues, professional assistance is often required for severe burn marks or extensive damage.
- When to Seek Professional Help
Deep-set burn marks or large-scale discolorations that DIY methods cannot fix indicate the need for professional intervention. Professionals have the expertise and tools to handle such cases effectively. For example, Cem Marble, a trusted name in Turkish marble and travertine, offers comprehensive solutions to restore marble countertops to their original glory.
- Advantages of Professional Services
Hiring professionals ensures a thorough and lasting repair. Their specialized equipment and techniques minimize the risk of further damage, restoring the marble to its original beauty.
- What to Look for in a Service Provider
Choose a reputable service provider with experience in marble care. Ask about their methods, products, and guarantees before hiring them. This ensures you receive high-quality service and peace of mind.